Disclosure: some GL.iNet links in this post are affiliate links. If you buy through them I may earn a small commission at no extra cost to you.
I have been running photo booths on GL.iNet travel routers for years, and I have written about pieces of it in several posts. This is the all-in-one, updated version: why a travel router, which one to buy in 2026, and exactly how to set it up so your iPads, print servers and printers just work at every venue.
Why a travel router?
- Your gear always sees the same Wi-Fi. Set up your iPads, laptop and print server once, at home, and they connect automatically at every event.
- Internet from anywhere. Venue Wi-Fi, a phone hotspot, a USB modem, a venue Ethernet jack, or a built-in 5G modem.
- Devices keep the same IP address, so print servers and sharing QR codes do not break.
- Better range than a phone hotspot or the tiny radio in a print server.
- VPN, guest network and real router features when the venue network gets in the way.
Which GL.iNet router in 2026?
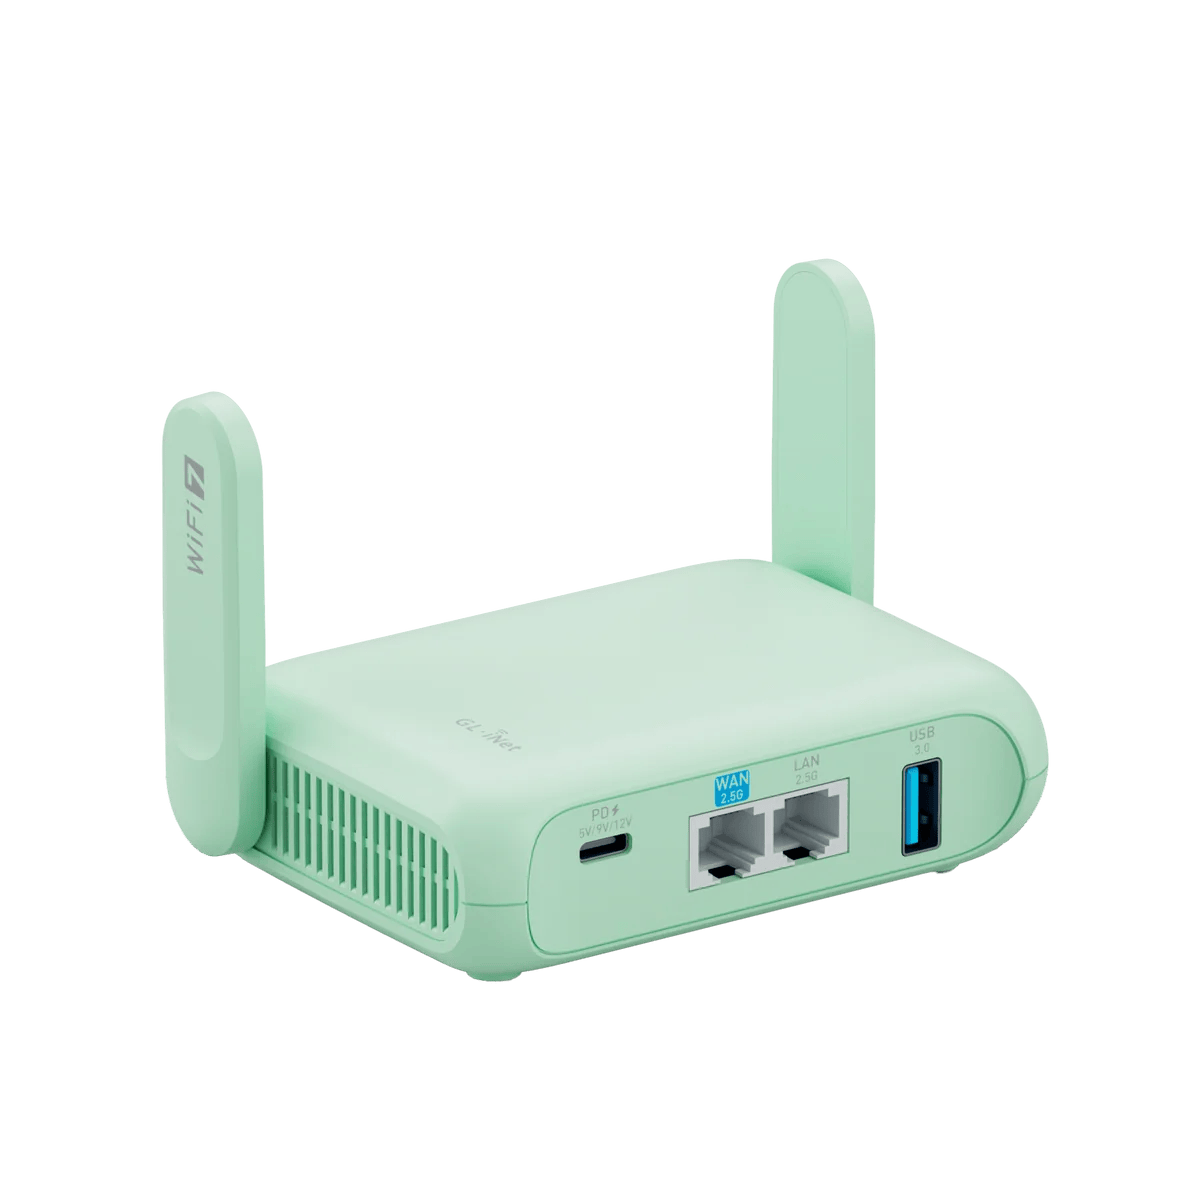
- Beryl 7 (GL-MT3600BE): my default pick. Compact dual-band Wi-Fi 7 with two 2.5G Ethernet ports and USB-C power.
- Slate 7 Pro (GL-BE10000): tri-band Wi-Fi 7 for multi-booth events or busy RF environments.
- Mudi 7 (GL-E5800): 5G with a battery and touchscreen, for venues with no usable Wi-Fi.
Already have an older GL.iNet like the AR750 or MT1300? It still works for everything below, but menus differ on the older 3.x firmware and some newer features are not available. Shop the current lineup through my GL.iNet link.
Two networking basics
- Private vs. public IP: think of an apartment building. The building has one street address (the public IP the venue or carrier gives you); each apartment has its own unit number (the private IPs your router hands to your iPads and printers).
- Your router makes its own network. GL.iNet routers default to 192.168.8.1. Everything in your booth lives on that network, no matter where the internet comes from.
Step 1: First-time setup at home
Power the router on, connect to its Wi-Fi (the default name and password are on the label), browse to 192.168.8.1 and set an admin password. Then set your own Wi-Fi name and password, and update to the latest firmware. GL.iNet's first-time setup guide walks through it. Connect every booth device to this Wi-Fi once, at home.
Step 2: Get internet at the venue
Option A: Venue Wi-Fi (Repeater)
In the admin panel go to INTERNET, then Repeater, scan, and join the venue network. The router shares that connection with your booth while keeping your own network name. See Repeater.
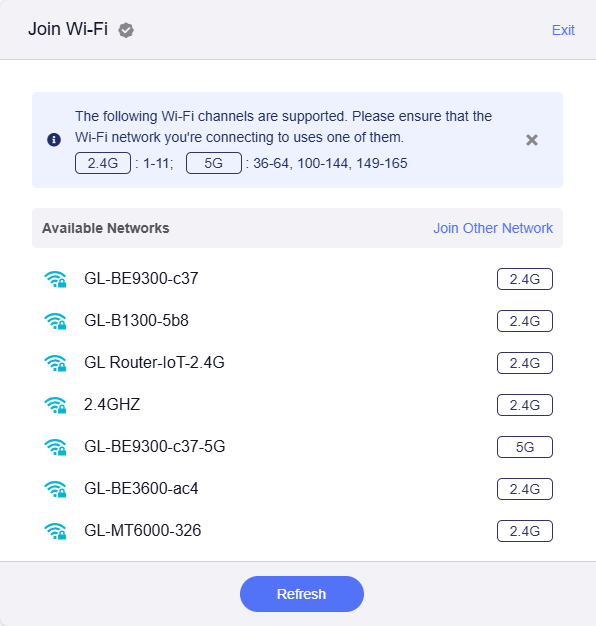
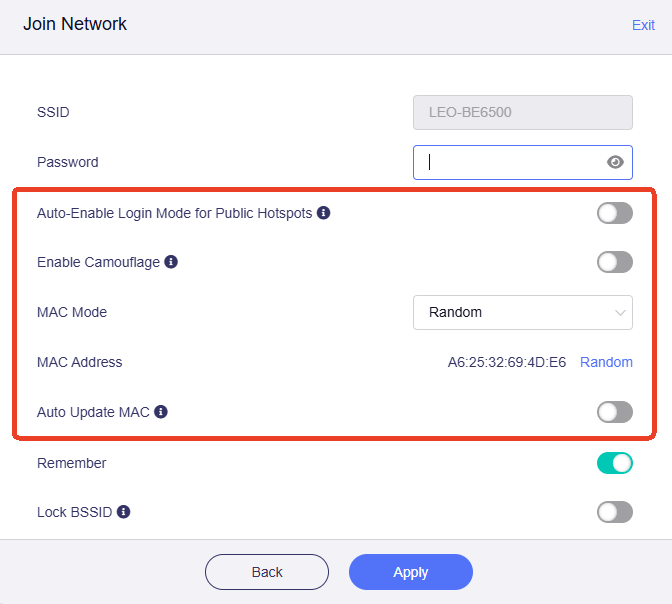
Captive portals (the "accept terms" page at hotels and venues) are the number one problem. Turn on GL.iNet's public hotspot options (login mode and camouflage), then open any web page from a device on your router to bring up the portal. If it still fails, clone the MAC address of a device that already got through, or ask venue IT to allow your router. Details: Connect to a hotspot with a captive portal.
Option B: Your phone (USB tethering)
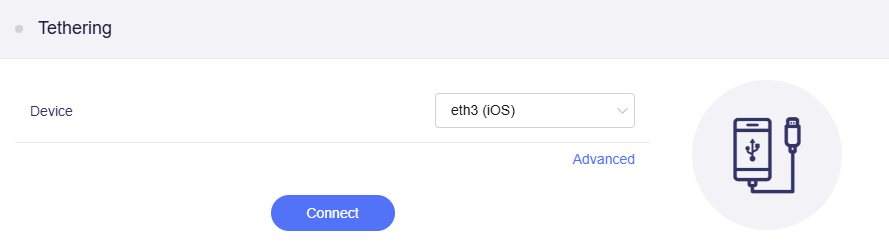
Plug your phone into the router's USB port, turn on Personal Hotspot (iPhone, tap Trust) or USB Tethering (Android), then click Connect under INTERNET, Tethering. A cable is more reliable than having the router join your phone's Wi-Fi hotspot. See Tethering.
Option C: Cellular or Ethernet
A Mudi 7 has its own 5G modem with a SIM or eSIM, and every model can use a venue Ethernet jack (plug it into the WAN port) or a compatible USB modem. A dedicated hotspot such as a MiFi set to USB Ethernet mode also works well.
Option D: All of the above, with failover
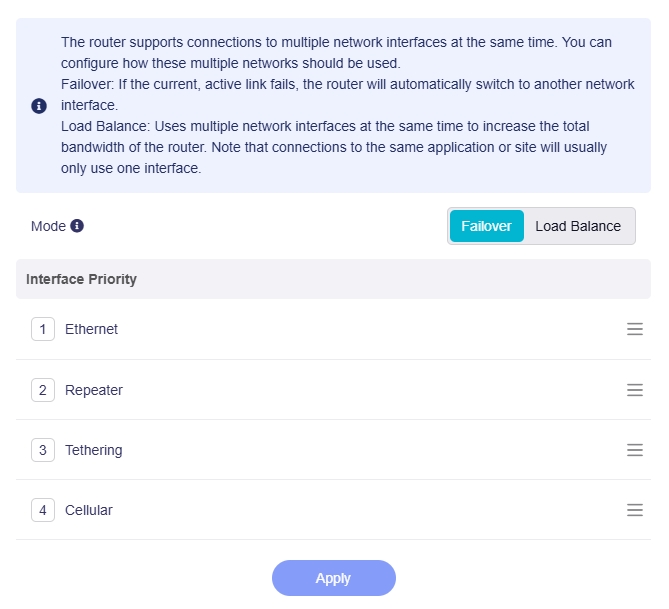
Set up two connections, for example venue Wi-Fi plus your phone, and use Multi-WAN in Failover mode. If the venue Wi-Fi drops, the router switches to the backup automatically.
Step 3: Connect your booth gear
- Print servers by cable, not Wi-Fi. Plug a DNP WCM2, AirCast Pro or print server laptop into a LAN port with Ethernet. Their built-in Wi-Fi radios are weak.
- iPads join the router's Wi-Fi, or go wired through a USB-C hub with Ethernet. See iPad Photo Booth Connectivity.
- Need more ports? Add a small unmanaged switch.
Step 4: Give every device the same IP every time
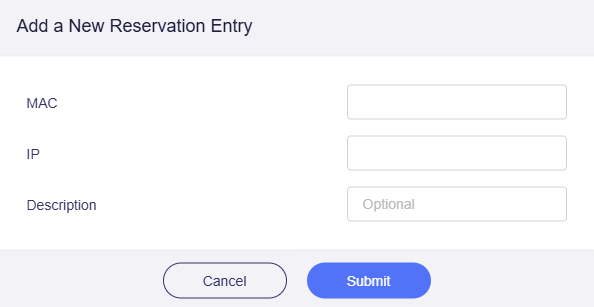
Under NETWORK, LAN, use Address Reservation to lock each device's IP. Pick the device by MAC address from the list, give it a name like "WCM2" or "Booth 1 laptop", and save. The device needs to reconnect once. See LAN and Address Reservation.
Why it matters: your print server address never changes between events, and apps that put the host computer's IP inside a "get your photos" QR code keep working.
Step 5: When the venue blocks things
Some venue networks let you online but block the traffic your booth needs. Turning on a VPN client on the router (WireGuard or OpenVPN) tunnels everything out and usually gets around it. Many VPN providers work; set it up and test it at home. More background in Using Venue WiFi.
Step 6: Guest Wi-Fi as an upsell
Turn on the guest network to offer a branded Wi-Fi for the event while keeping guests off your booth network.
Quick troubleshooting checklist
- Can you reach 192.168.8.1? If not, you are not on the router's network.
- Is the router online? Check the INTERNET page for each connection.
- Captive portal? Open a plain http page from a device on the router.
- Printer missing? Check the cable and that the reserved IP matches.
- Still stuck? Restart the router, then the print server, then the iPads, in that order.
Go deeper
- IMHO The BEST Travel Router for Photo Booth Use (original 2021 write-up)
- GL.iNET: Assigning devices an IP
- My setup for WIFI/printing at events
- DNP WCM2: AirPrint done meh
- Using Venue WiFi
Do your own homework: This post shares what has worked for me, but software, firmware and hardware change all the time. Before you change settings, install anything or buy gear, research it yourself and read the official manuals and support documents for your exact model and version. Test everything well before an event. This is the internet: I accept no liability for any mistakes, damage, data loss or missed shots that come from following this post. Use it at your own risk.