Originally published August 22, 2021 on my old blog, Murphy Things, and moved here in November 2026. Some product details and prices may have changed since it was written.
Travel router update (November 2026): the setup in this post works with any GL.iNet travel router, and these are the current models I recommend for photo booths:
- Beryl 7 (GL-MT3600BE): my go-to. Compact dual-band Wi-Fi 7, two 2.5G Ethernet ports and USB-C power, so it runs off the same power bank or charger as the rest of the booth.
- Slate 7 Pro (GL-BE10000): tri-band Wi-Fi 7 for big events with several booths, iPads and print servers on one network.
- Mudi 7 (GL-E5800): 5G cellular with a battery and touchscreen, for venues with no usable WiFi at all.
Shop the current lineup through my GL.iNet link (affiliate). The steps and settings in older posts still apply; menus on newer firmware may look slightly different.
In the post about what IMHO The Best Travel Router I talked about how it can be used to provide your gear both consistent network and internet access. Now I will talk about how to eliminate some footwork in having the Travel Router always give your devices the same IP.
Here are some of the benefits/the WHY of doing this:
- Your gear (Photo Booth PC, Print Server, Sharing stations, etc.) will always have the same IP address (Aka what apartment number each device is in your ” apt. complex” of devices)
- Assigning it on the Travel Router means not having to assign it on each device; This is relevant if you’ve ever had to manually assign/figure out an IP address every event…
- If you run multiple booths, they can all have the same/similar network setup; easier to manage when things go wrong.
- When using a program like MediaShare, the host PC IP address part of what the “Get your photos” QR code contains.
Now it’s time for the HOW to do this, with some commentary mixed in:
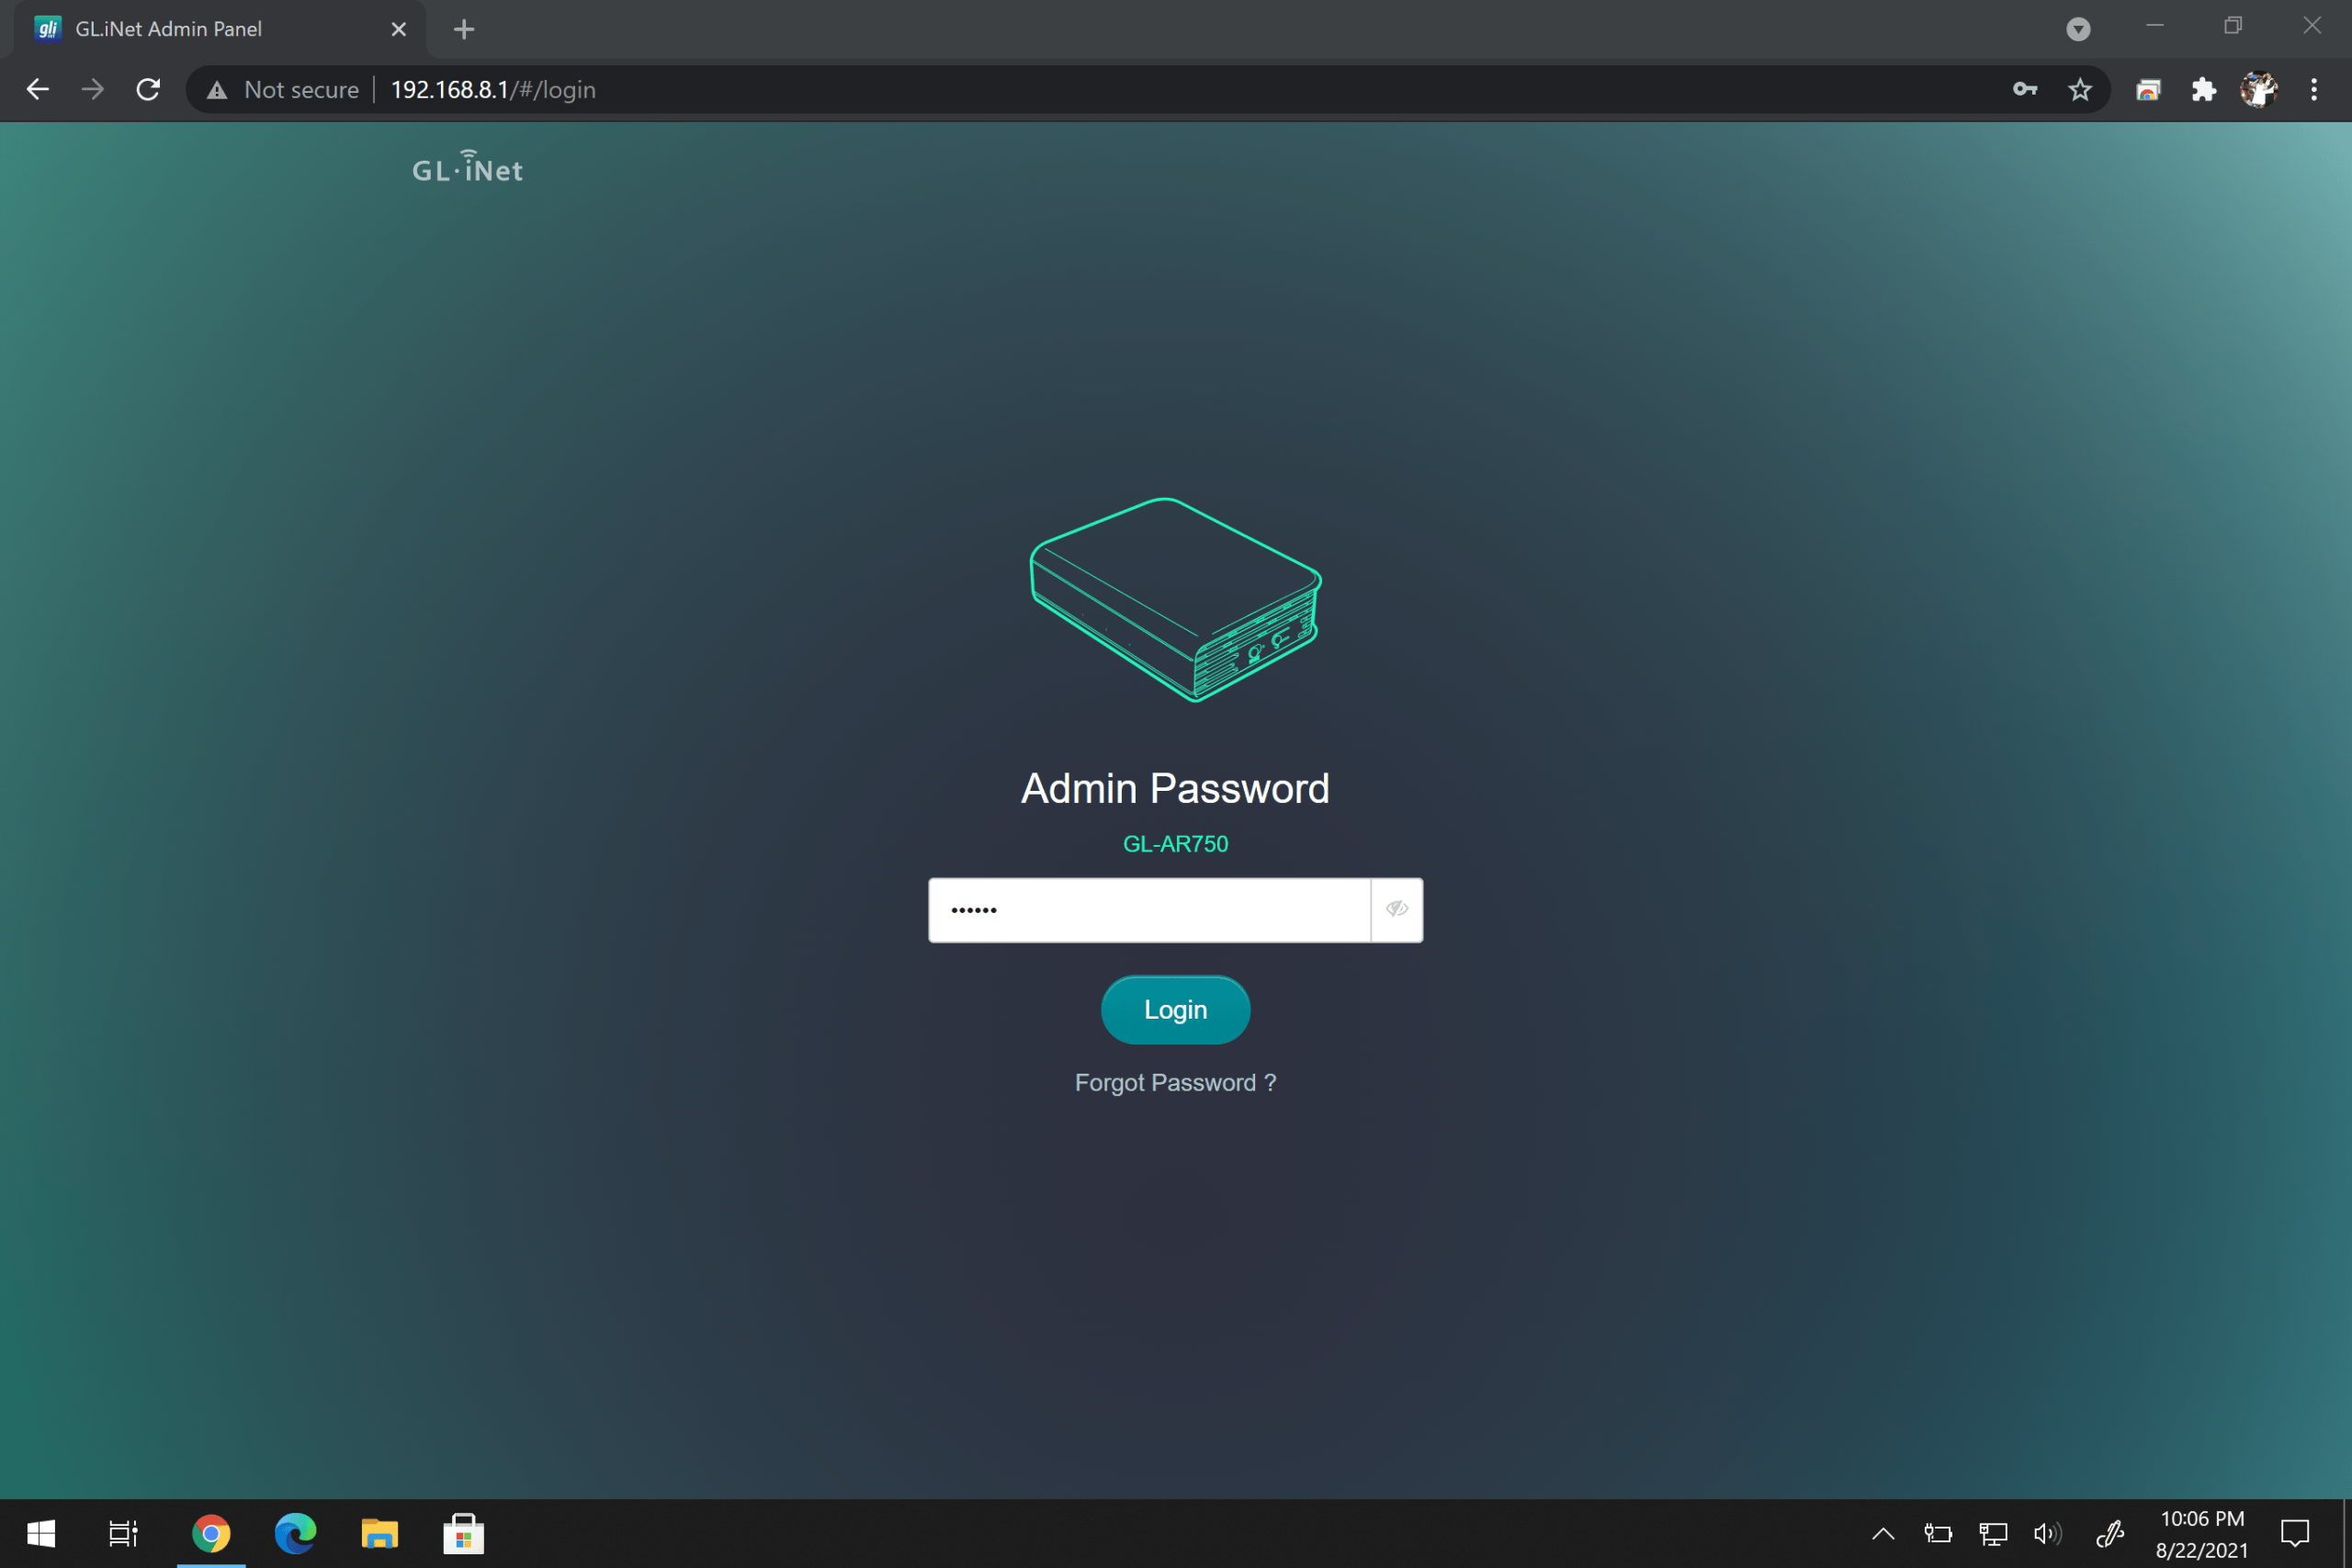
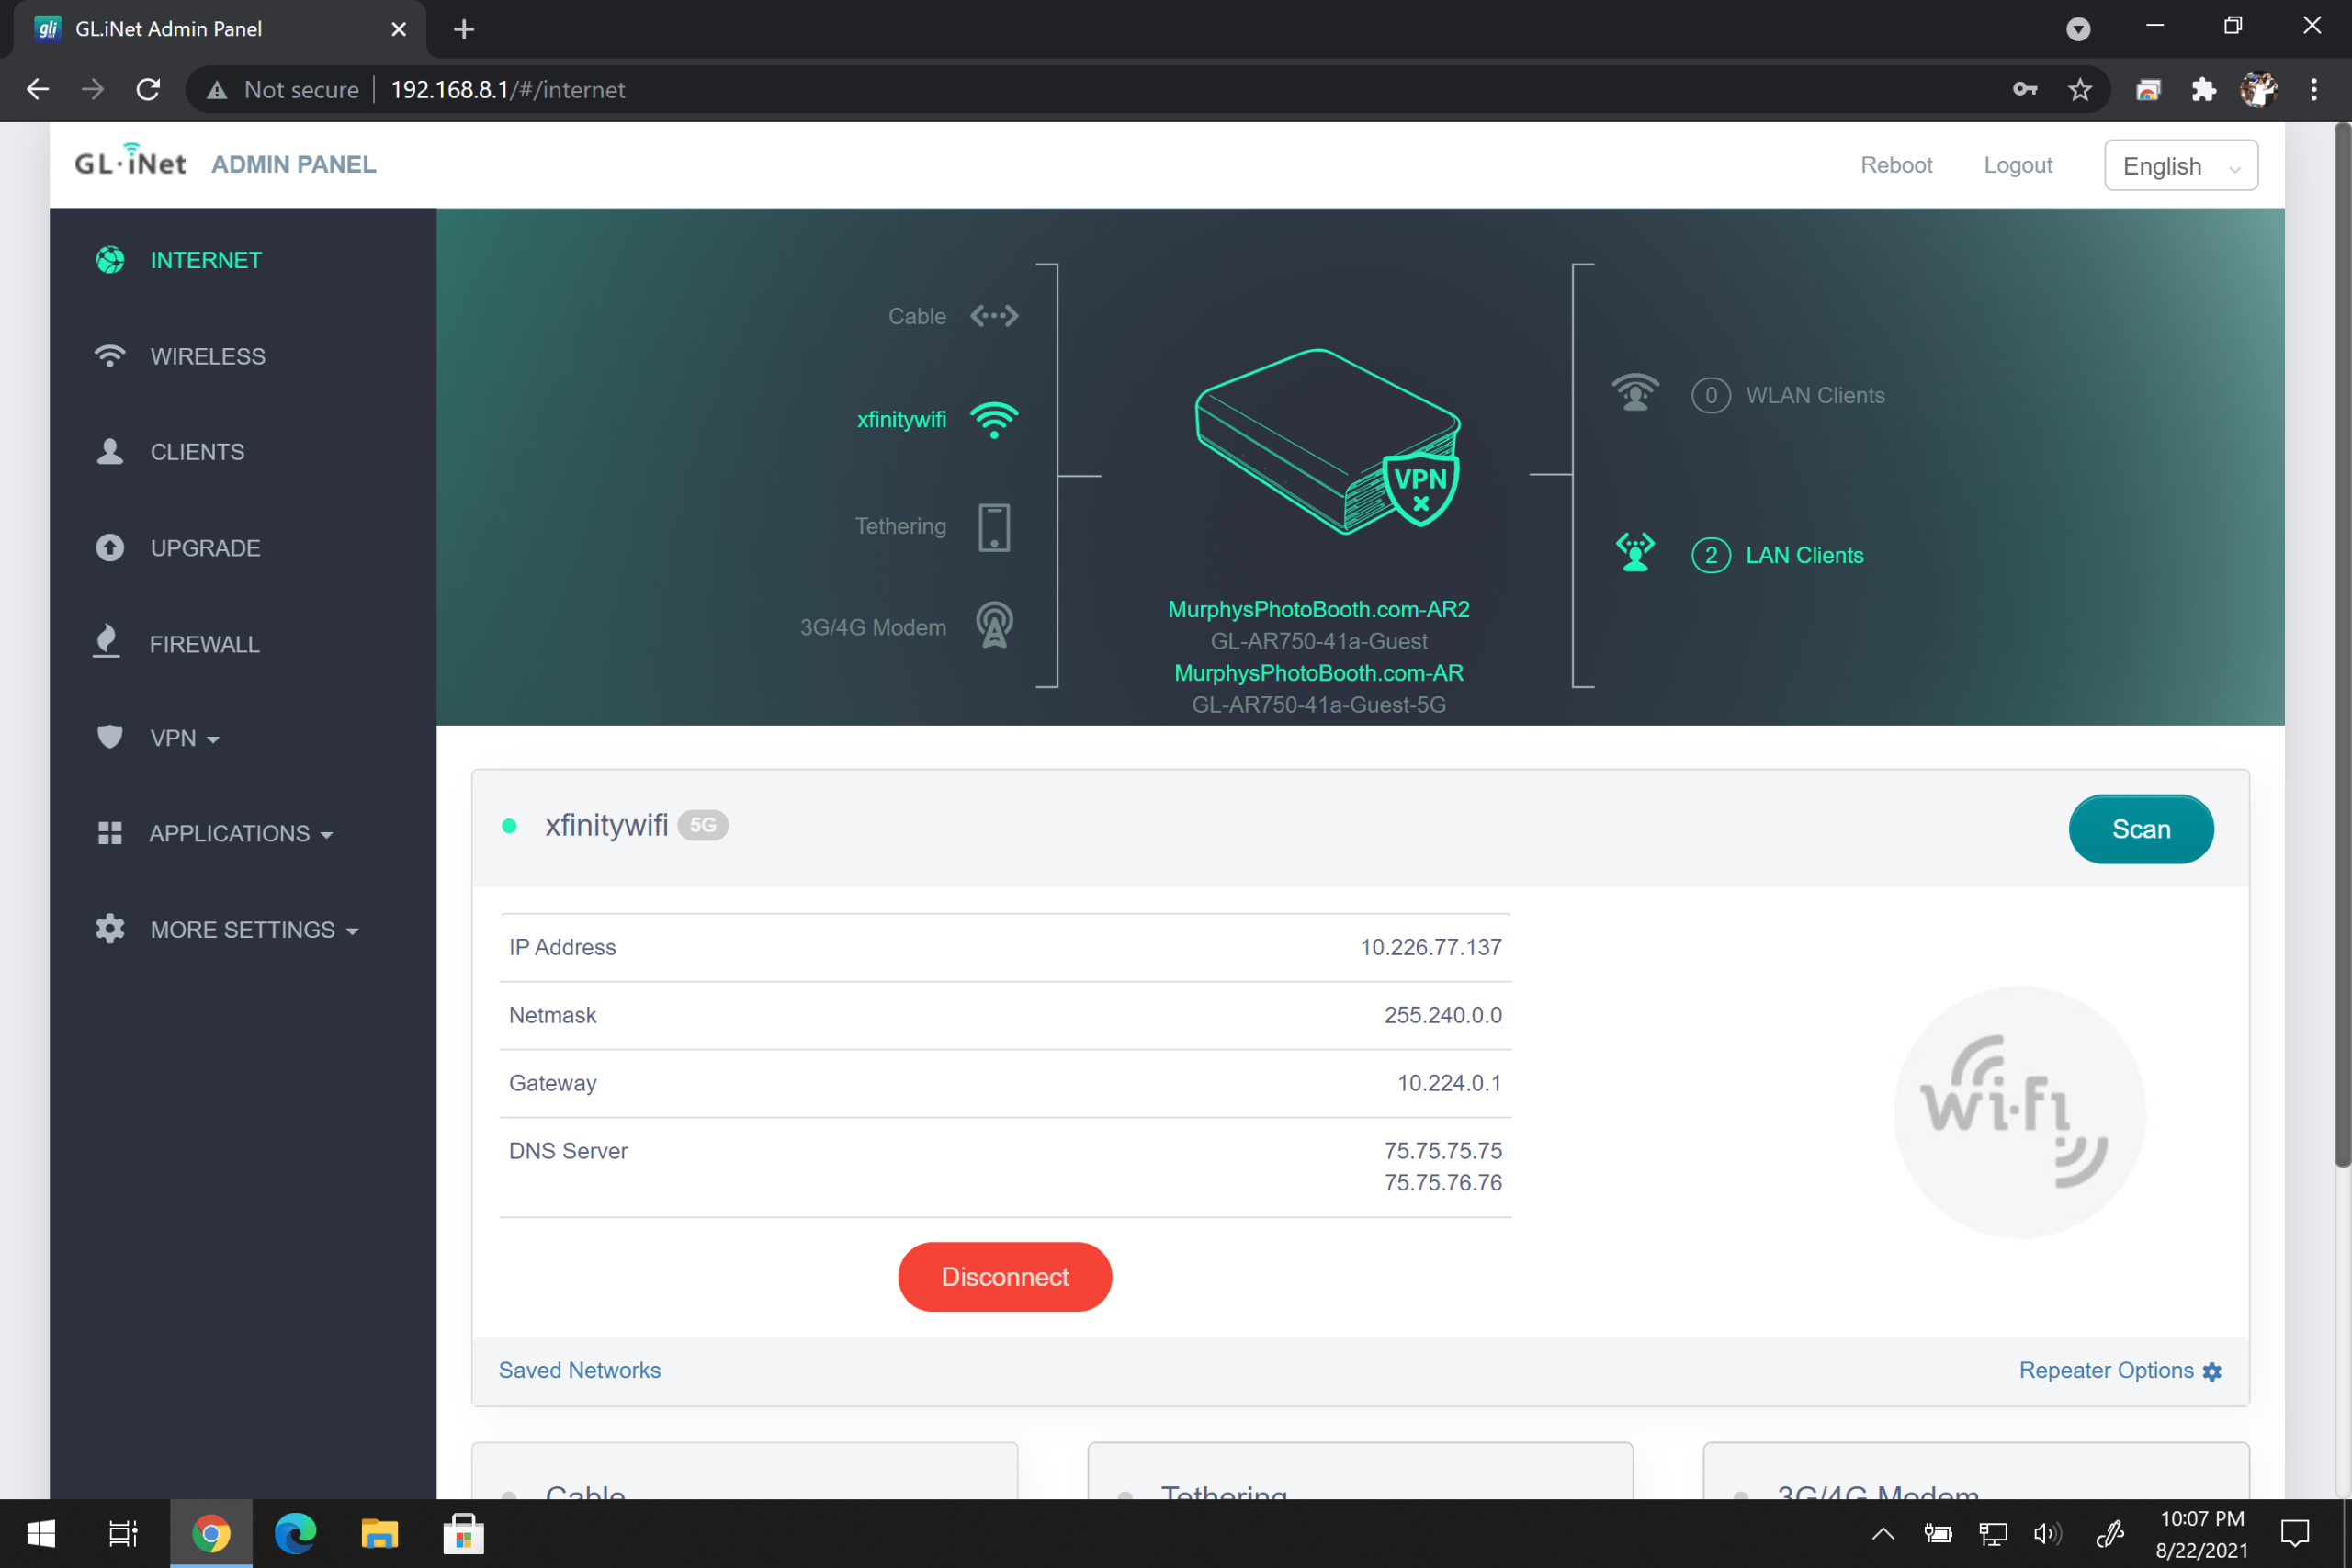
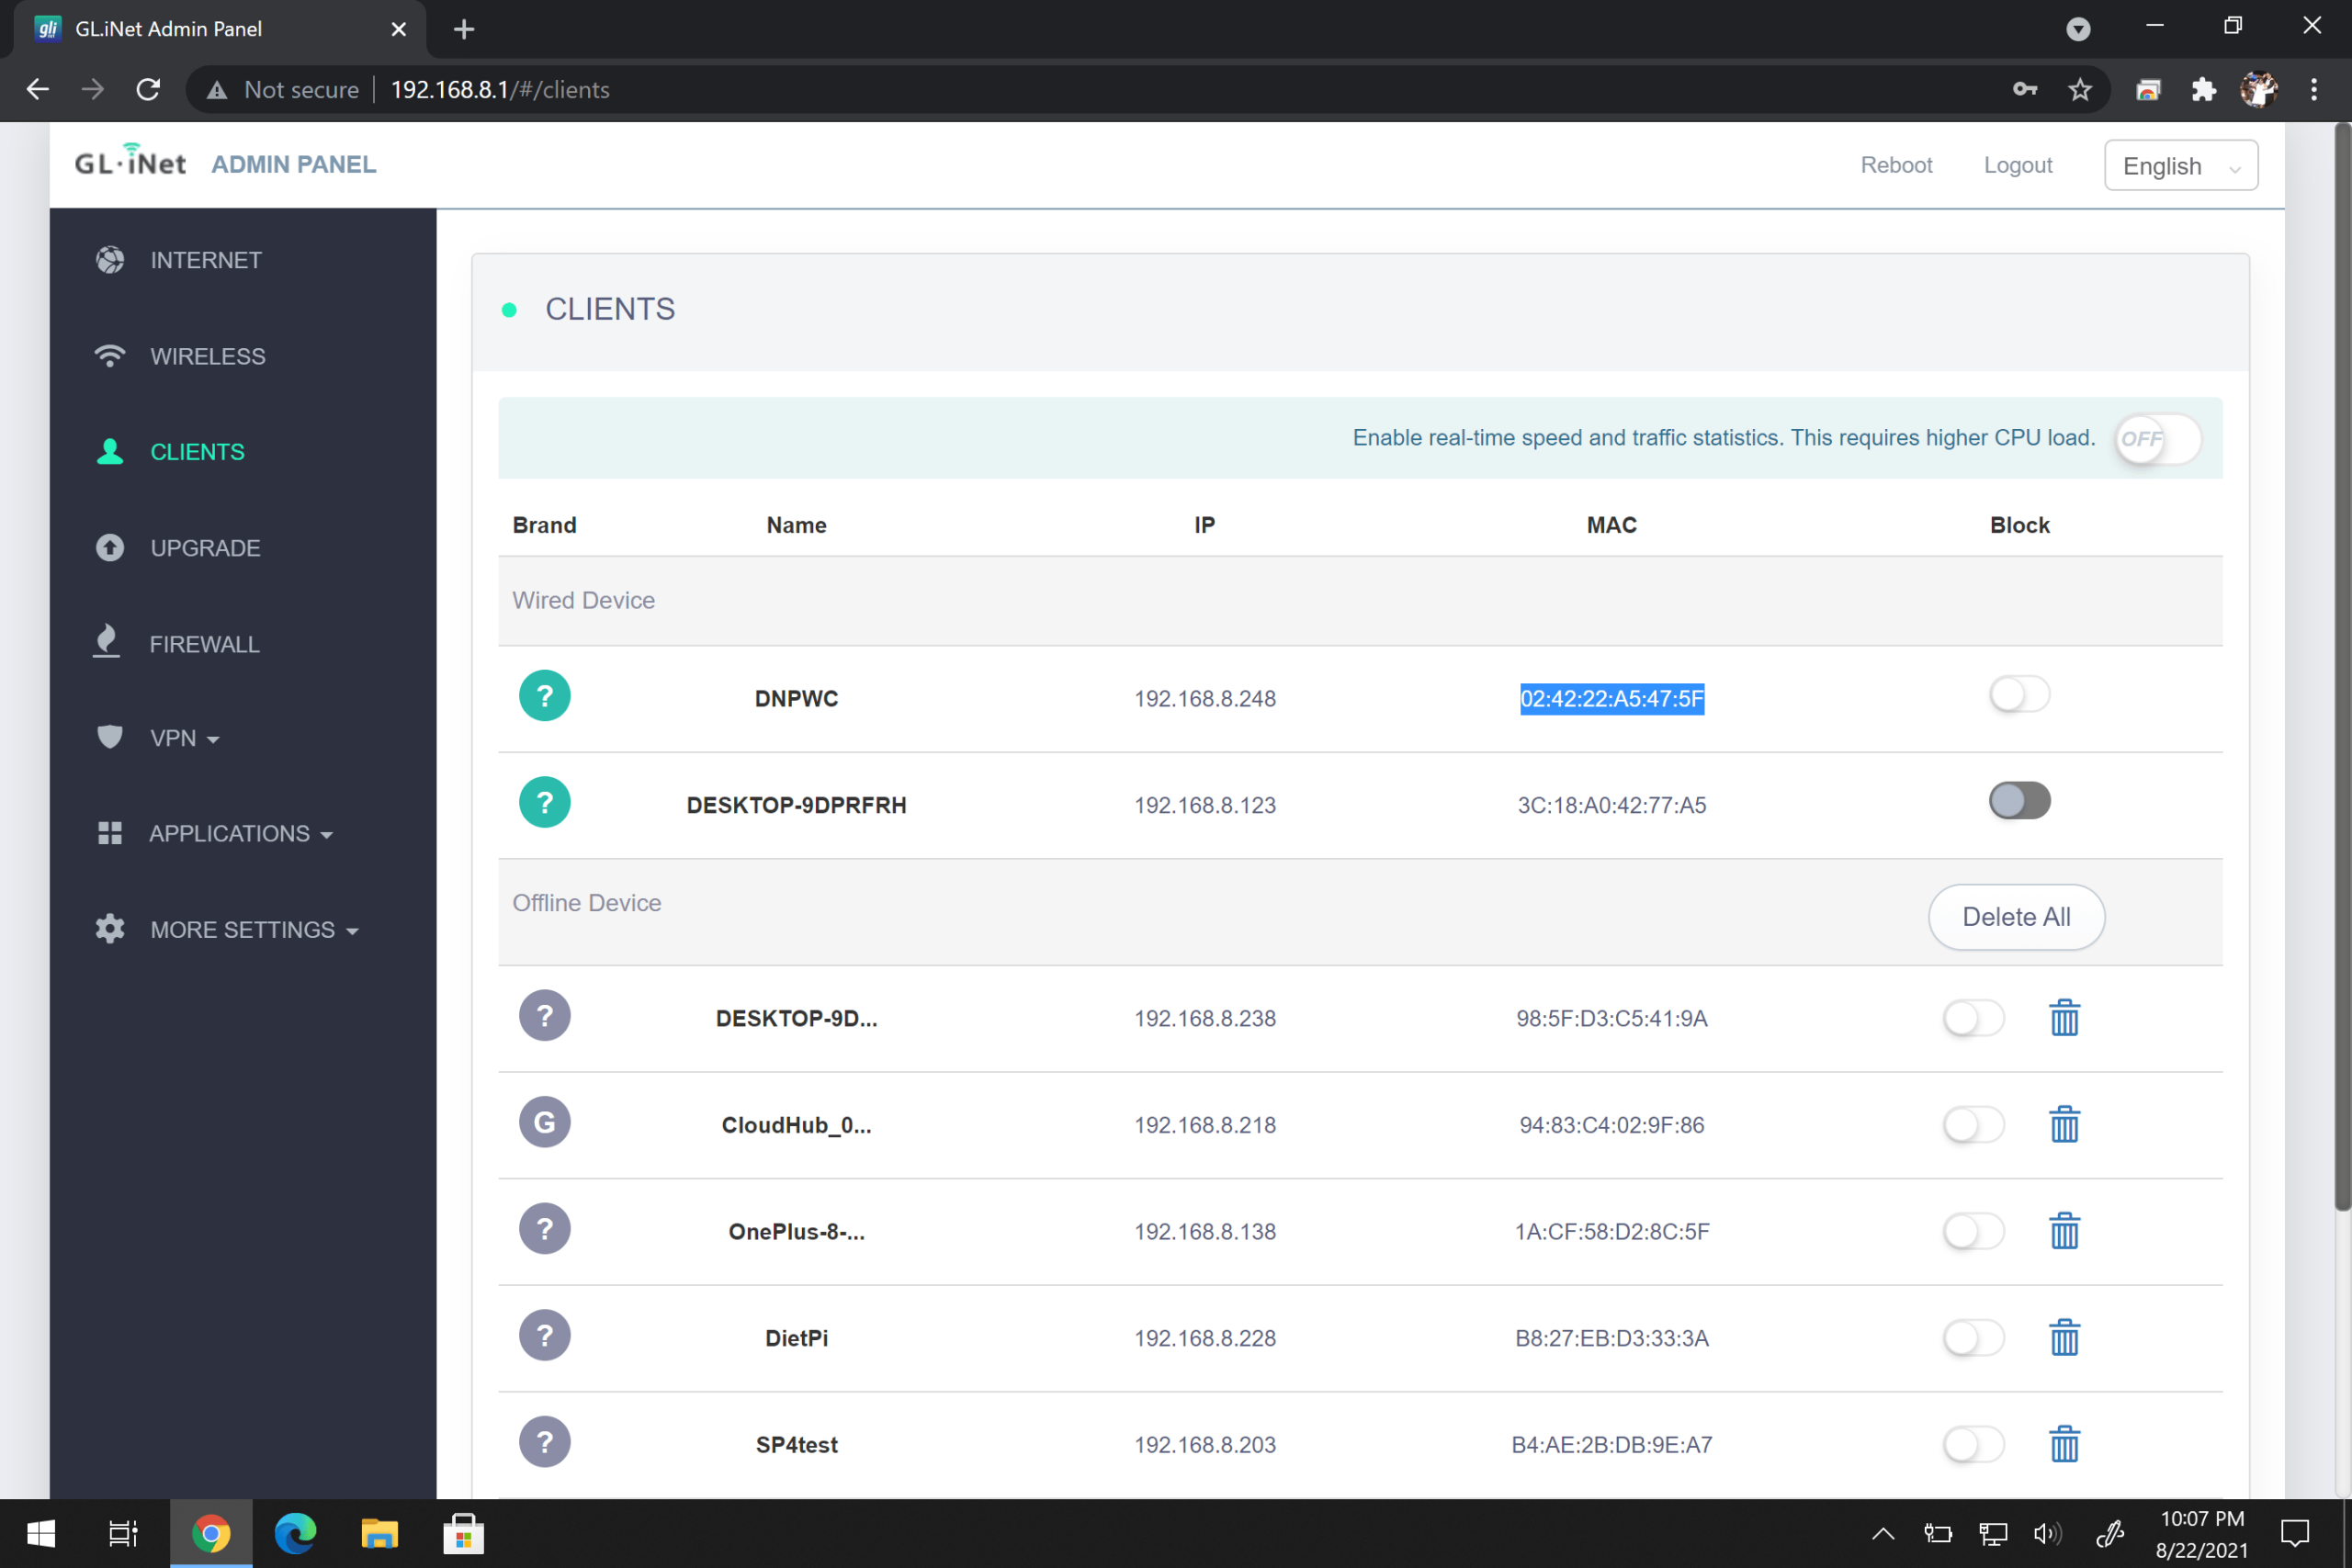
- Log in to your Travel Router, I am using the GL.iNET Default of 192.168.8.1 (It goes in your URL bar) and head to the CLIENTS page.
- Take not of each devices MAC address that you wish to assign an IP (A MAC Address is a unique identifier to all network interfaces, whether it is wired, wireless, Bluetooth, etc.)
3. Navigate to the MORE SETTINGS/LAN IP section and scroll down
4. In the drop down menu find the MAC address of the device you want to assign. In the example it is my DNP WCM, select the MAC Address.
5. Enter the IP address you want the device to have. Since the Travel Router IP is 192.168.8.1 you MUST use 192.168.8.### (Can be from 2-245) I chose 192.168.8.6
6. Click Add
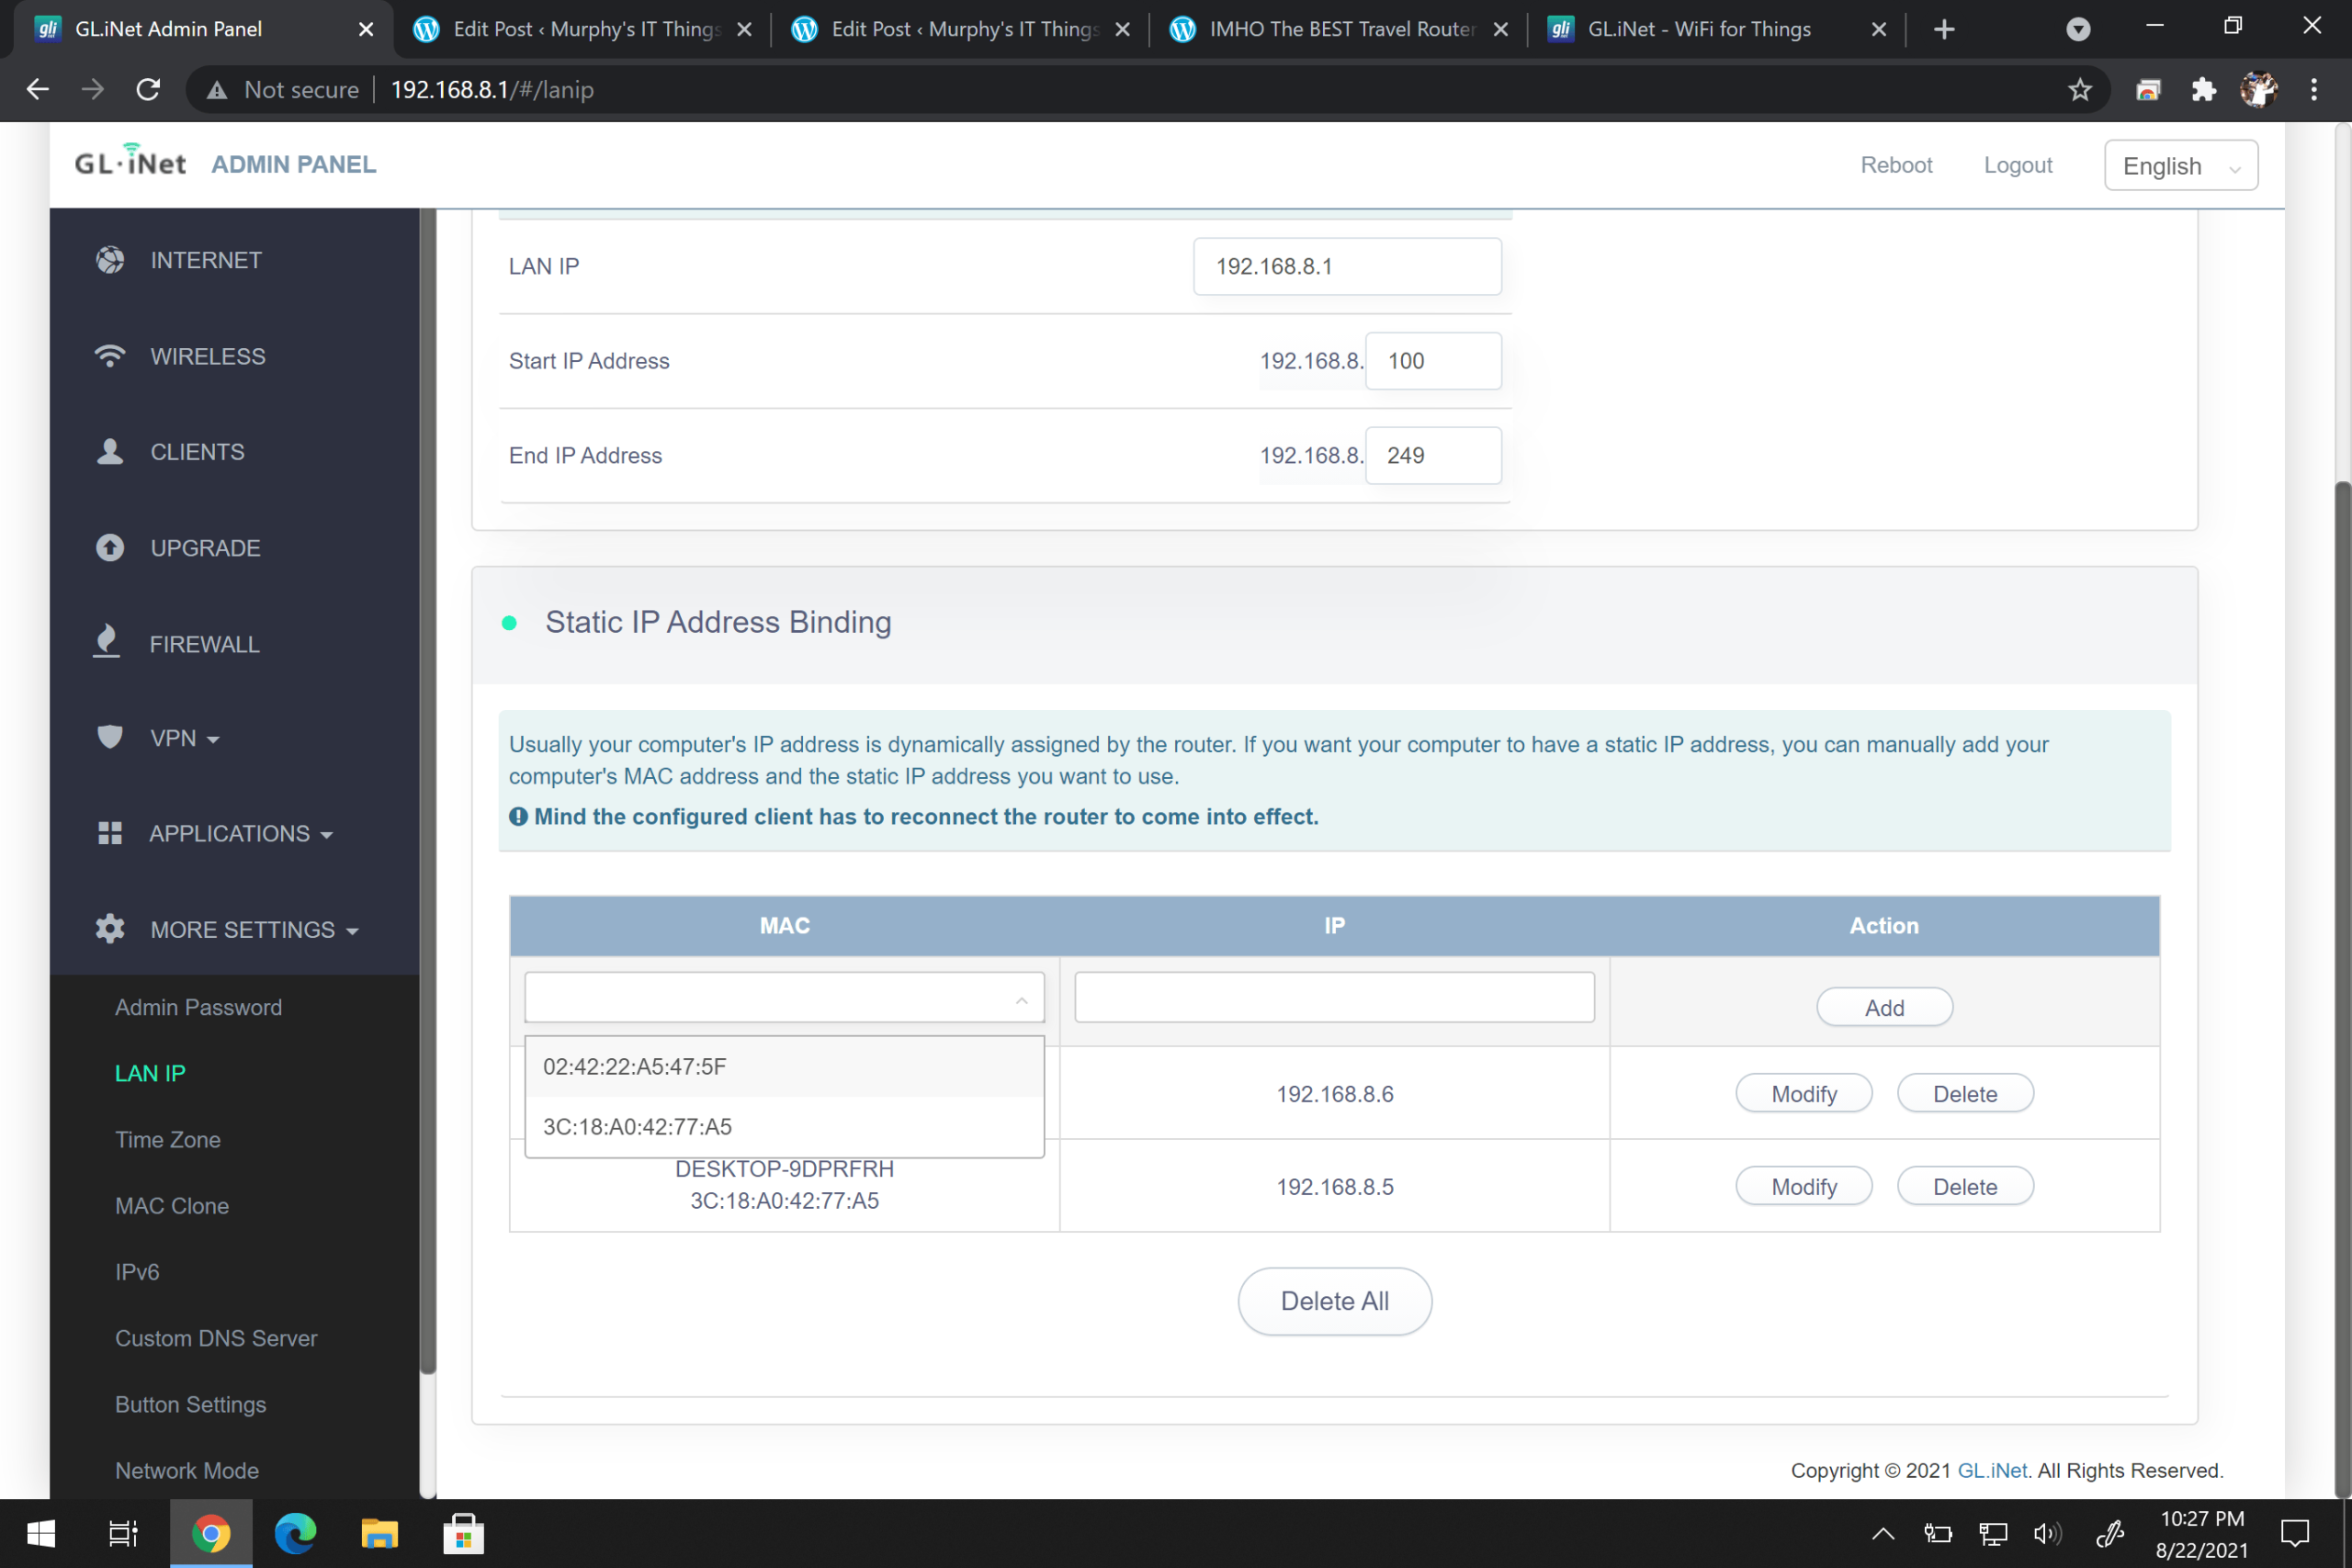
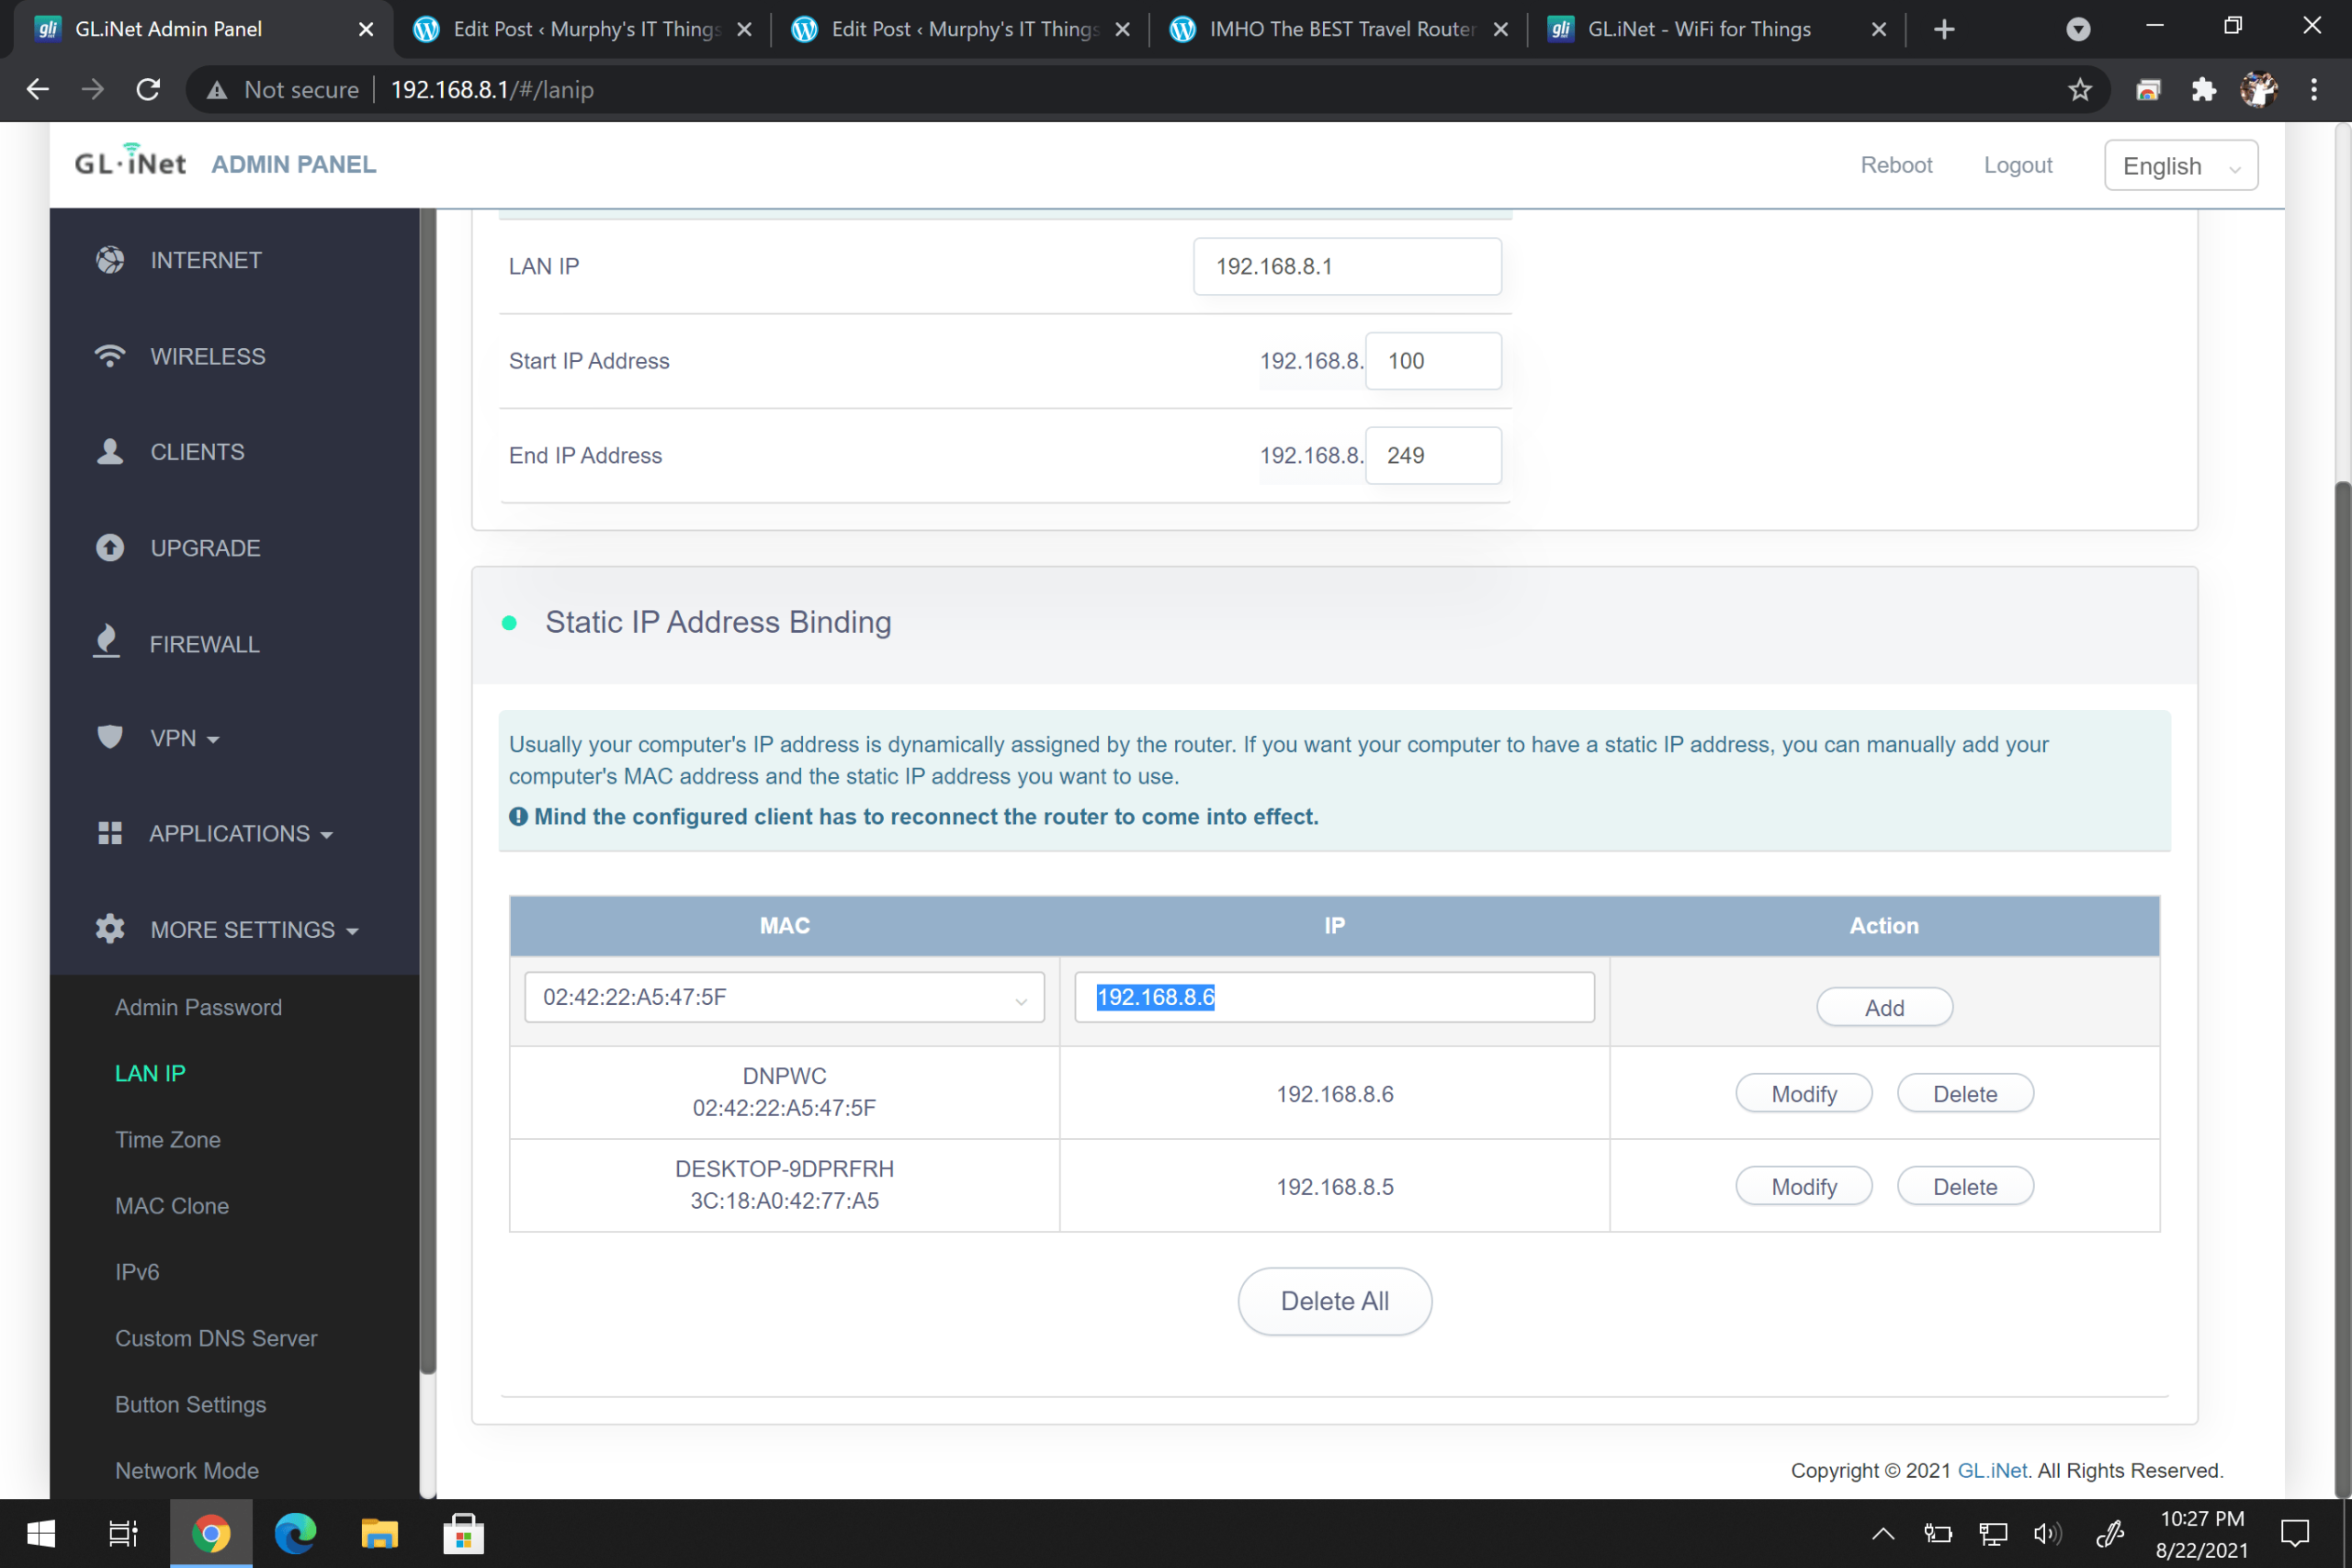
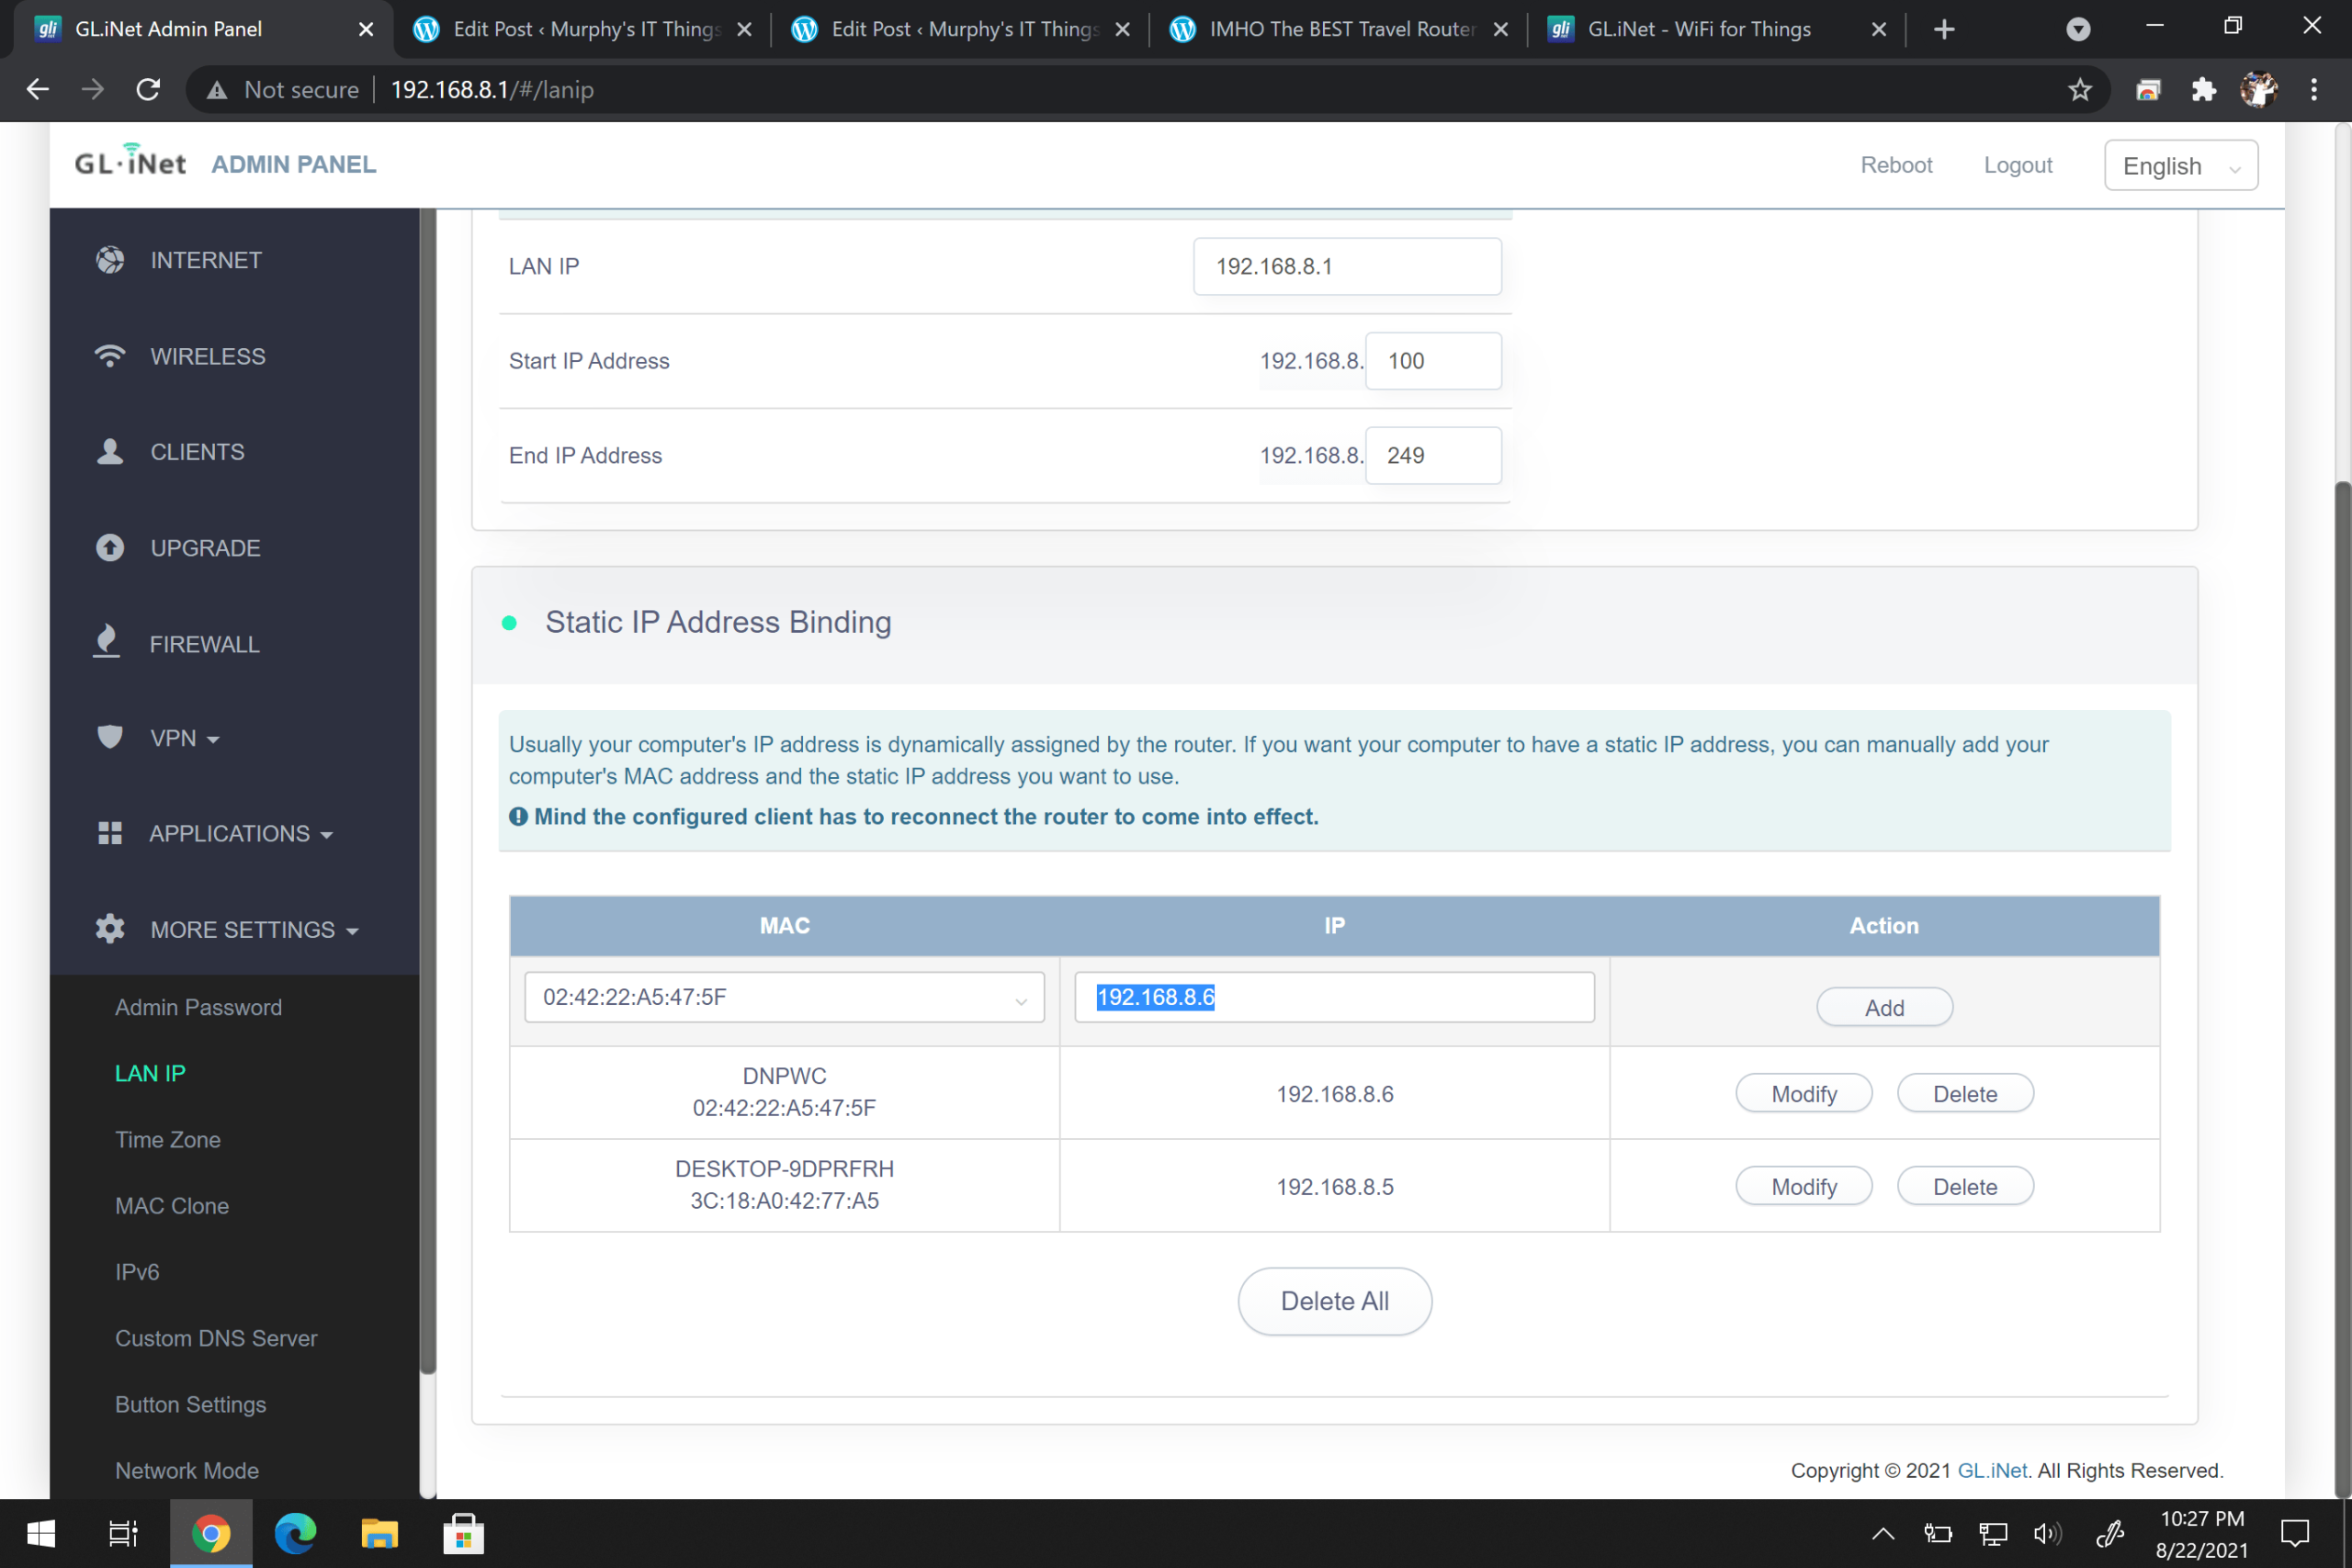
7. Reconnect the device to the Travel Router (restart the device, unplug and plug back in its network cable)
8. Browse back to the CLIENTS section and it should now have the assigned IP.
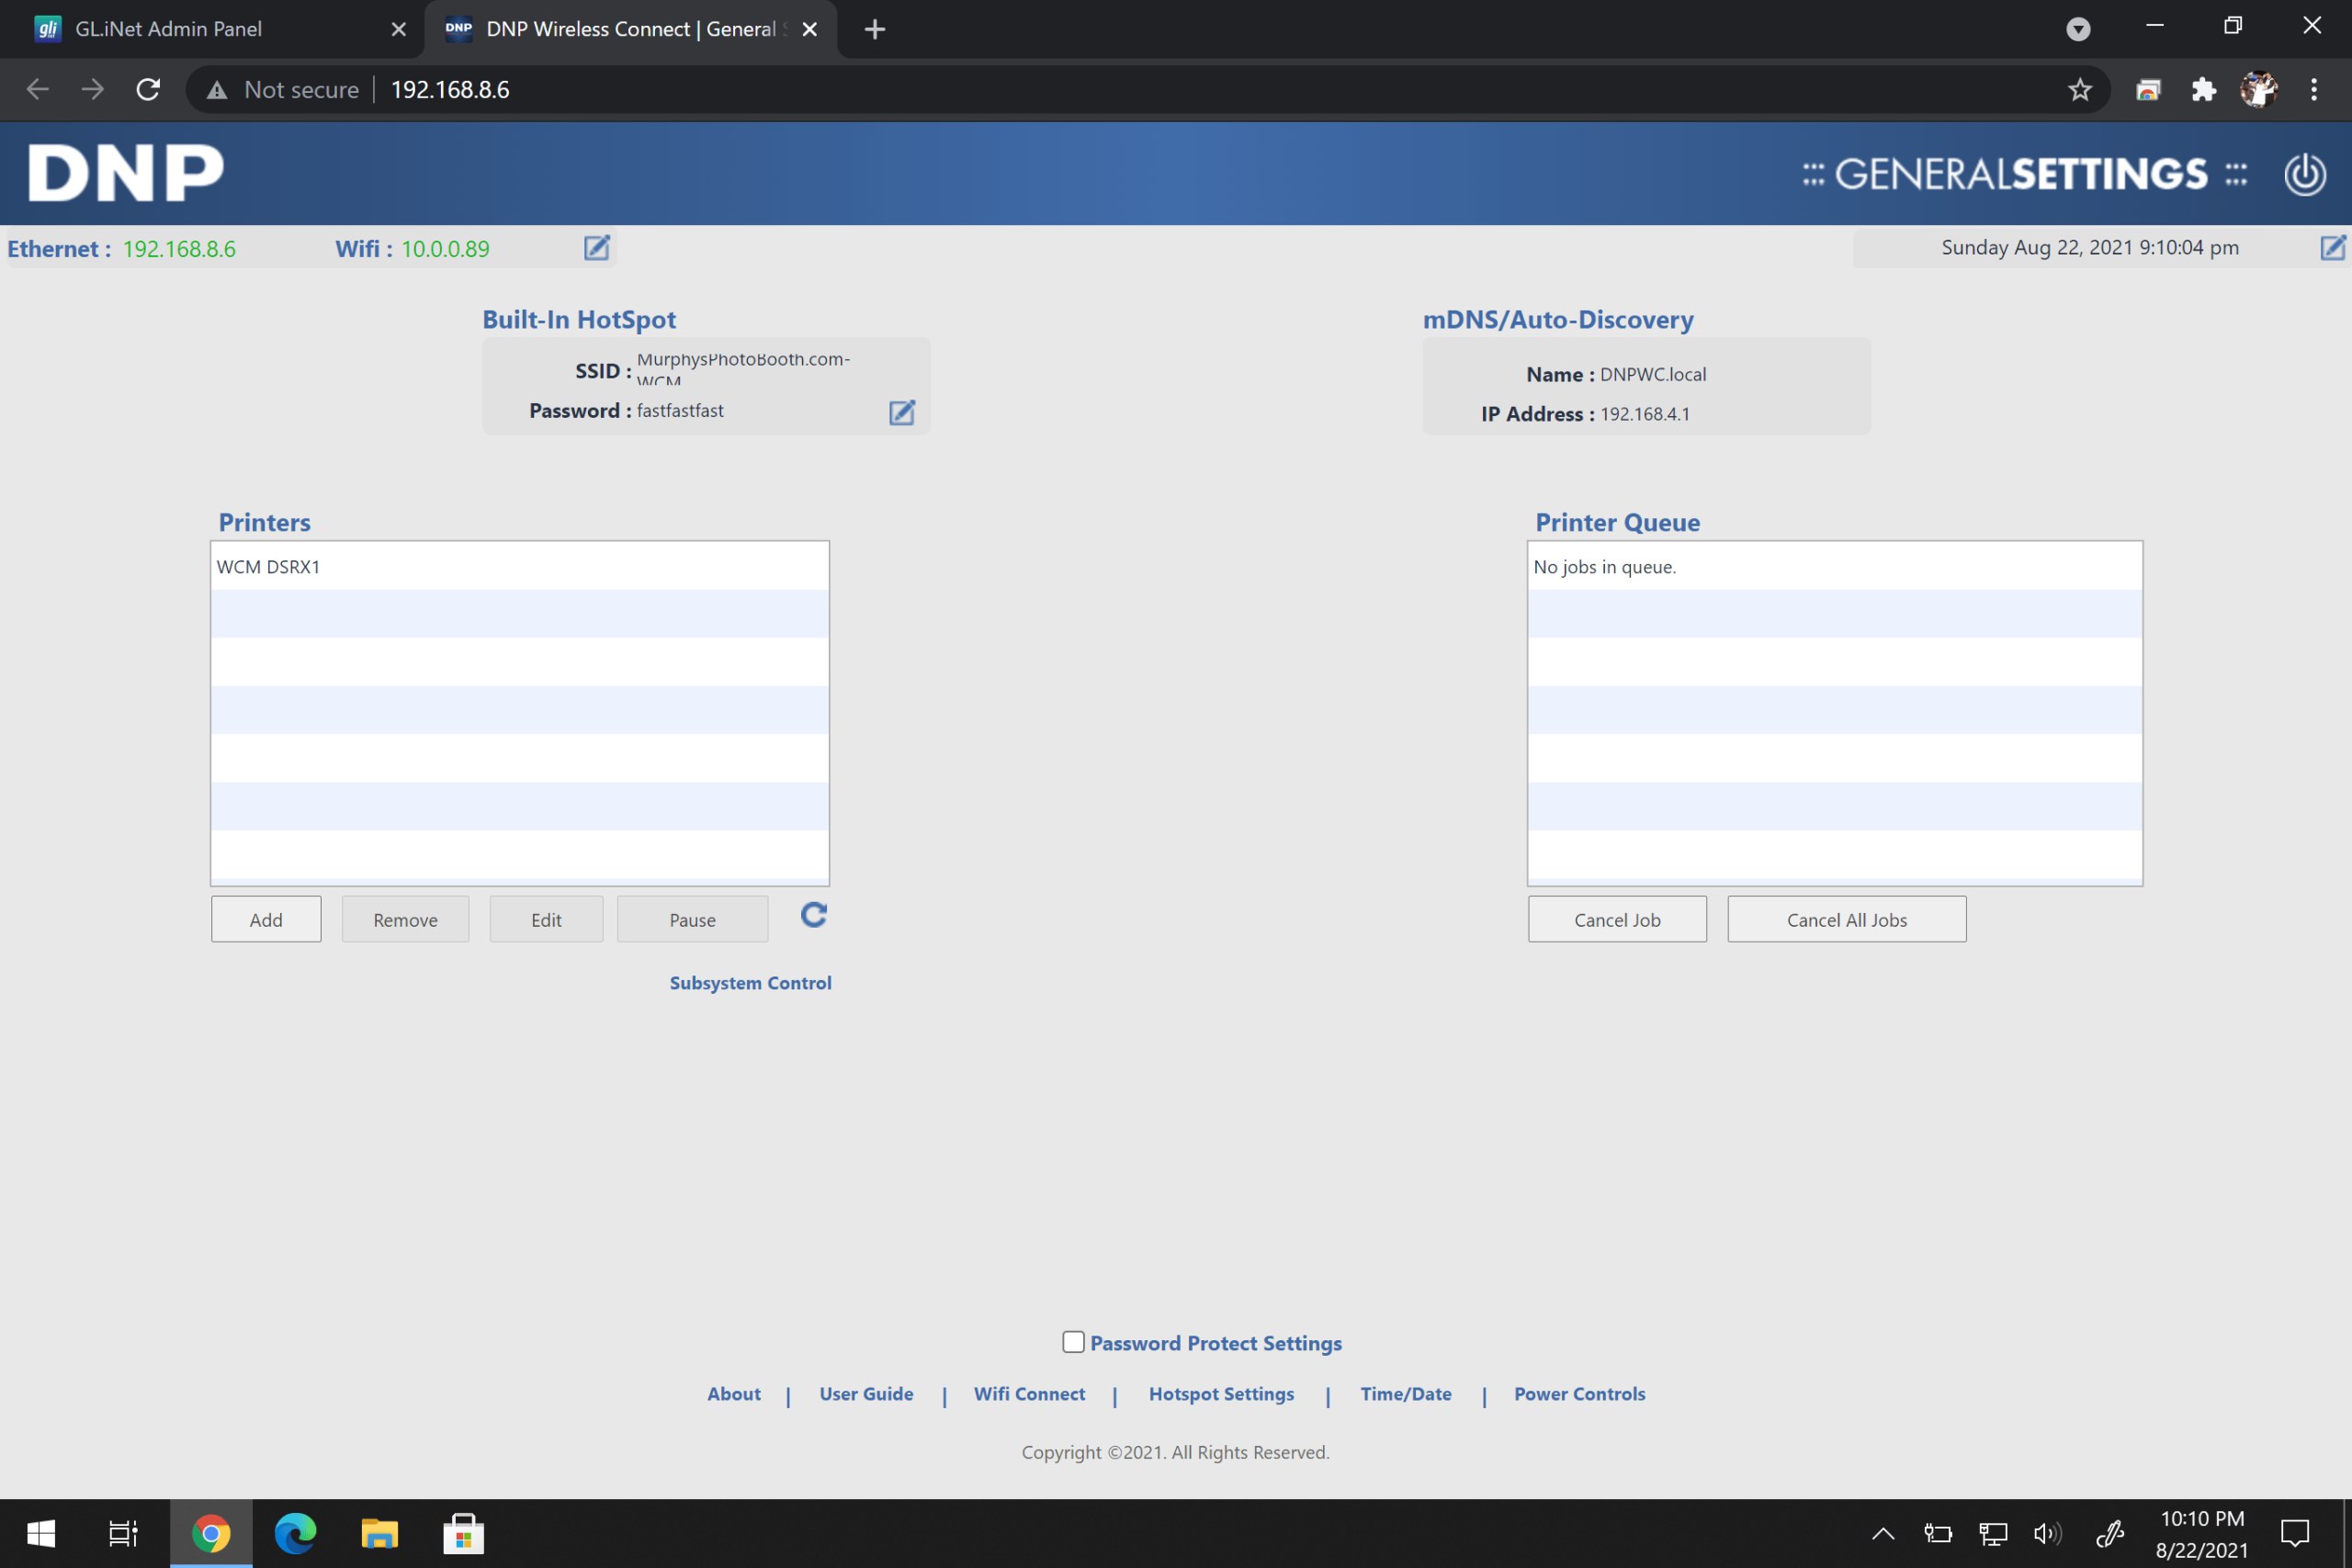
That is about it. For my WCM I connect it to the travel router via Ethernet, and have my devices connect to Travel Routers WiFi NOT the WCM’s WiFi.
For MediaShare users: Connect your MS Host PC to the travel router via Ethernet cable, NOT WiFi. This will free up more WiFi ability for your guests devices, and will result in a faster file transfer.
WiFi USB Dongles, and WiFi in general is an extra layer of protocols for your network traffic to go through when compared to Ethernet “hard wired” access.
Disclosure: I may earn a small commission for my endorsement, recommendation, testimonial, and/or link to any products or services from this website. Your purchase helps support my work in bringing you information about whatever it was you just read about.
Network or connectivity problems at a venue? Get a real technician in your corner. I work with Photo Booth Support, which offers 24/7 technical support for booth operators by phone, chat and remote access for software, printer and camera issues. Plans are per booth and month-to-month: Emergency covers live-event emergencies around the clock, and Premium adds scheduled non-emergency help and training on your software. There are also setup and training appointments.
Want one-on-one help with a custom setup? I also do custom consulting for photo booth operators.
Do your own homework: This post shares what has worked for me, but software, firmware and hardware change all the time. Before you change settings, install anything or buy gear, research it yourself and read the official manuals and support documents for your exact model and version. Test everything well before an event. This is the internet: I accept no liability for any mistakes, damage, data loss or missed shots that come from following this post. Use it at your own risk.